You’re packing for a long flight maybe you’re already figuring out how to pack for tropical Thailand for a sunny two-week getaway. You want to look decent when you land
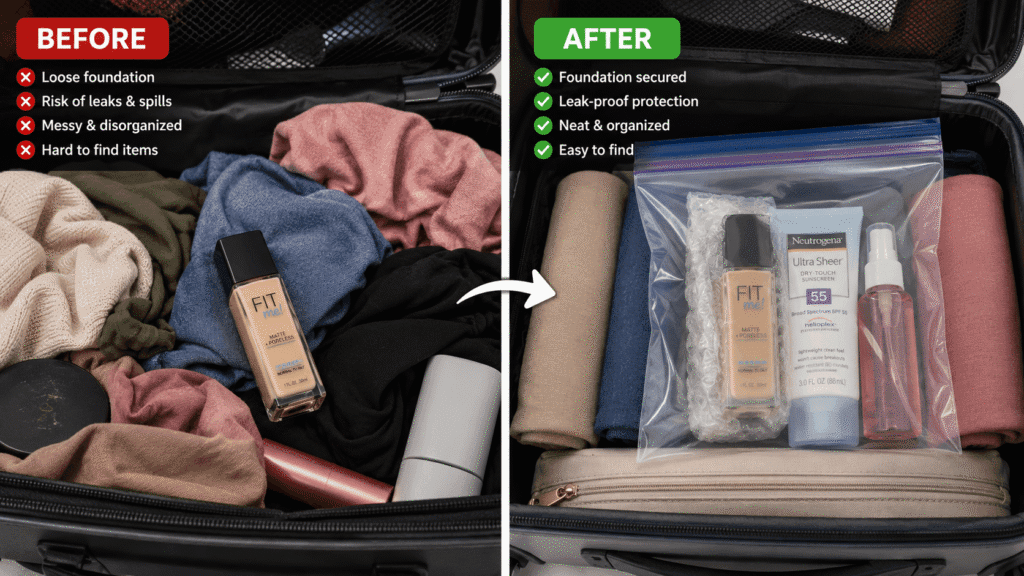
But here’s the problem: liquid foundation is one of the most leak-prone products you can pack. You’ve probably had it happen before.
You open your carry-on and foundation is everywhere. All over your clothes. All over other products. It’s a disaster.
Now you’re standing at your bathroom counter holding your favorite foundation bottle, stressed about whether to pack it or leave it behind.
Here’s what makes this so frustrating: liquid foundation is hard to find in other formats. Powder foundation isn’t the same. It doesn’t give you the coverage or finish that liquid does.
So you don’t want to leave it behind. But you’re genuinely worried it’s going to leak.
The good news: you can pack liquid foundation safely on a flight. It won’t leak if you know what you’re doing. This applies to any long flight, whether it’s 4 hours or 14 hours. The principles are the same.
I’m going to walk you through exactly how to pack liquid foundation so it arrives completely intact. No leaks. No stress. Your foundation is safe and you can look fresh when you land.

Why Liquid Foundation Leaks on Flights
Before we talk about solutions, let’s understand why this actually happens.
Air Pressure Changes
The main culprit is cabin pressure. Inside an airplane, the cabin is pressurized to simulate an altitude of around 8,000 feet. But the actual altitude might be 35,000 feet. There’s a significant difference between outside pressure and cabin pressure.
When your foundation bottle is sealed at sea level with internal air at normal pressure, then the cabin pressure drops during flight, there’s pressure difference between inside and outside the bottle.
This pressure difference creates tension. If the bottle isn’t sealed perfectly, or if the cap loosens even slightly, that pressure difference can cause the liquid to seep out.
Temperature Changes
Temperature fluctuations also matter. Your foundation might expand or contract slightly due to temperature changes. If it’s sealed tightly and expands, that creates internal pressure that can force the cap off or cause leaking through micro-cracks.
Vibration and Movement
During flight, there’s constant vibration and movement. The plane is shifting. Turbulence happens. Your luggage is being jostled in the overhead compartment or under the seat.
If your foundation bottle isn’t secured properly, it bounces around. If the cap isn’t on tightly, liquid sloshes around and finds its way out.
Poor Bottle Design
Some foundation bottles just have crappy lids. Cheap brands with loose-fitting caps are way more likely to leak. Better brands with well-designed caps are less likely to leak. But even good caps can leak if pressure and temperature changes are severe.
TSA Rules for Liquid Foundation
Before we talk packing, let’s clarify what you’re actually allowed to carry.
Liquid foundation is classified as a liquid by the TSA. The TSA 3-1-1 rule applies: liquids in containers of 3.4 ounces or less, in a single quart-sized clear bag, one bag per passenger.
So you can carry one bottle of liquid foundation in your carry-on if it’s 3.4 ounces or smaller. Most standard foundation bottles are between 0.5 and 1 ounce, so you’re fine.
If you have a larger bottle (more than 3.4 ounces), you must put it in checked luggage.
For a 14-hour flight, you might want to carry foundation in your carry-on anyway, even if it’s small. That way if your checked bag is delayed, you still have your makeup.
Method 1: The TSA Quart Bag Technique
This is the safest method for carrying liquid foundation in your carry-on.
Step 1: Get a TSA-Approved Quart-Sized Bag
Get a clear quart-sized plastic bag. This is the standard TSA-approved size. You can find these at any drugstore or online. They’re cheap (a few dollars for a pack).
The bag needs to be resealable (like a Ziploc) and clear (so TSA can see inside).
Checkout the prices of TSA-Aprroved Quart-Sized bag
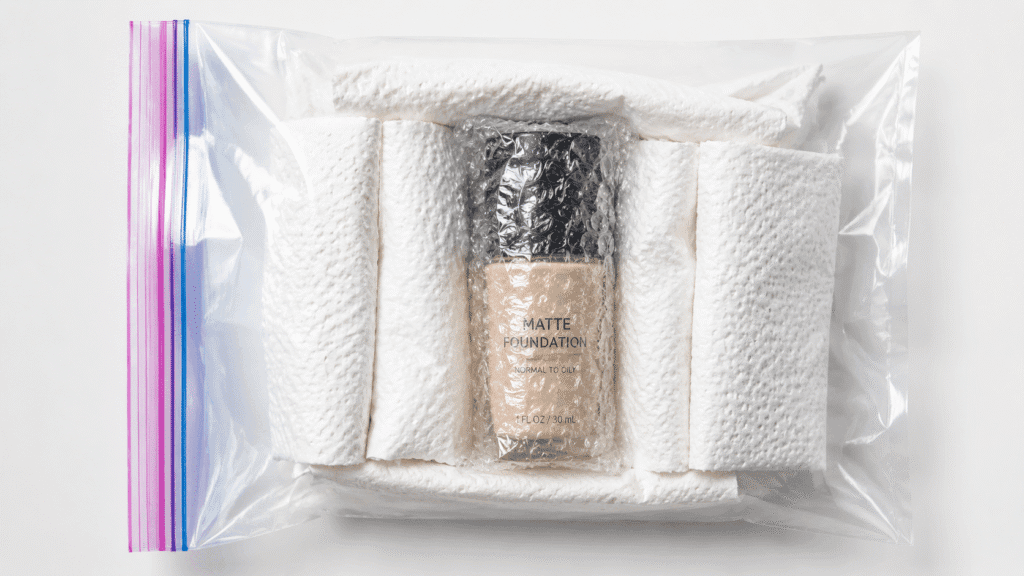
Step 2: Wrap Your Foundation Bottle
Before putting your foundation in the bag, wrap the bottle in something absorbent. Paper towels work. Tissue works. Cloth works.
The idea is to create a buffer that will absorb any liquid if the bottle leaks inside the bag. You don’t want loose liquid sloshing around in the bag.
Wrap the foundation bottle loosely (not so tight that you’re adding pressure). Then place it in the center of the quart-sized bag.
Step 3: Add Extra Absorbent Material
Put additional paper towels or cloth around the wrapped bottle inside the bag. Create a cushion that will absorb any potential leakage.
If the bottle does leak slightly, the absorbent material catches it before it gets on your other stuff.
Step 4: Seal the Bag Securely
Seal the bag completely. Make sure the seal is tight. This creates a secondary barrier. Even if the foundation bottle cap loosens, the liquid stays in the bag, not all over your carry-on.
Step 5: Place in Carry-On
Put the sealed quart bag in a accessible part of your carry-on. Not buried at the bottom. You want to be able to access it at security without digging through everything.
Why This Works
The quart bag creates multiple barriers: the foundation bottle cap, the wrapped insulation around the bottle, the sealed plastic bag, and the absorbent material. Even if one barrier fails, the others catch it.
TSA agents expect to see liquids in quart bags, so there’s no confusion or hassle at security. You’re following the rules perfectly.
Method 2: The Checked Luggage Solution
If you have a larger foundation bottle or you’re packing multiple liquid products, checked luggage is sometimes better.
Why Checked Luggage Can Be Safer
Checked luggage experiences less pressure change than carry-on. The cargo hold is pressurized similarly to the cabin. There’s less temperature fluctuation in cargo than in the cabin where you’re sitting.
Checked bags aren’t handled as gently as carry-on (they get tossed around more), but they’re in a different pressure environment, so leaking is less likely.
How to Pack in Checked Luggage
Put your foundation bottle in the center of your checked bag. Surround it with soft items: clothes, socks, towels. Create cushioning so it doesn’t bounce around.
Put it in a plastic bag (quart-sized or larger, doesn’t matter for checked) with absorbent material, just like the carry-on method.
Place this whole bundle in the center of your checked bag, surrounded by more soft items.
The more cushioning, the less the bottle moves. The less movement, the lower the leak risk.
Method 3: The Travel-Size Backup
This is less about preventing leaks and more about having a backup.
Buy a travel-size version of your foundation (many brands make 0.5 ounce versions). These bottles are tiny, well-sealed, and less likely to leak because there’s less product inside.
Carry the travel-size in your carry-on using the quart bag method. If your regular foundation leaks in checked luggage, you have a backup.
Travel-size bottles are also useful because you’re not carrying a full-size bottle for a two-week trip. A travel size is more convenient.
The downside: travel-size costs more per ounce. But for peace of mind and convenience, it’s worth it.
Method 4: The Silicone Seal Method
This is for people who want extra security and don’t mind a small modification.
Get Silicone Seal Tape
Get waterproof silicone seal tape (also called plumber’s tape or PTFE tape). This is cheap and available at hardware stores or online.
It’s used to seal pipe threads but works great for securing bottle caps.
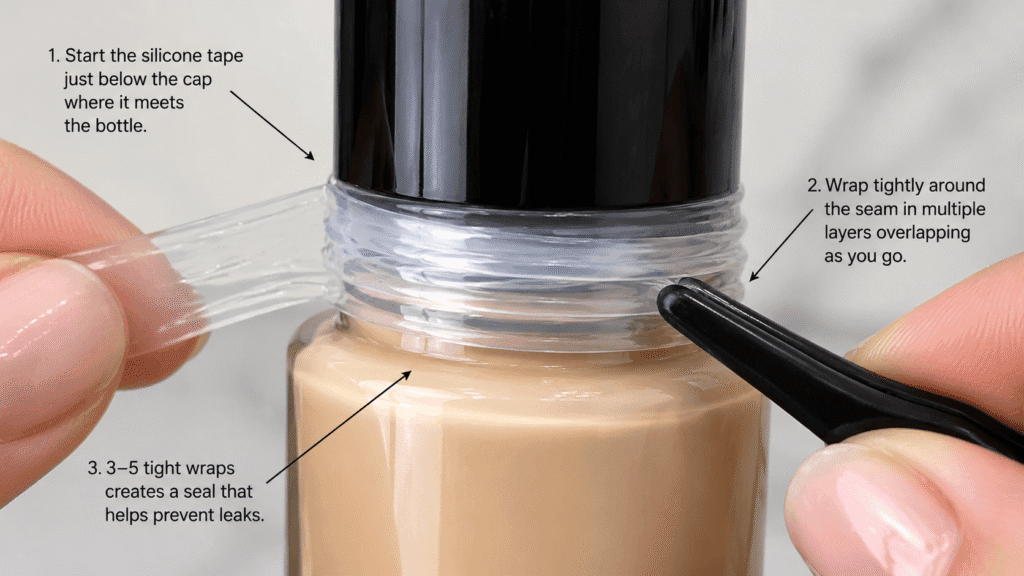
Wrap Around the Cap
Before you pack your foundation, wrap the silicone tape around where the cap meets the bottle. Wrap it tightly around the seal area, about 5 to 10 times.
The tape creates an extra seal that makes it almost impossible for the cap to loosen or liquid to escape.
Then Use Other Methods
After applying the silicone tape, use one of the methods above (quart bag, checked luggage packing, or travel-size backup).
Why This Works
The silicone tape adds mechanical security to your bottle’s seal. Even if pressure changes or vibration tries to loosen the cap, the tape holds it in place.
This is the most secure option but requires one extra step.
Products That Help
Beyond just packing techniques, some products make carrying liquid foundation easier.
TSA-Approved Toiletry Bags
These are quart-sized bags made specifically for TSA compliance. Some have multiple compartments. Some are padded. Some seal with zippers instead of sliding seals.
Quality toiletry bags make organizing your liquids easier. They’re around $5 to $20 depending on quality.
Travel-Size Foundation Bottles
Brands like Urban Decay, MAC, Charlotte Tilbury, and Fenty make travel-size foundations. These are 0.5 to 1 ounce and designed specifically for travel.
They cost more per ounce than full-size but they’re convenient, well-sealed, and perfect for flights.
Makeup Organizer Pouches
These are small pouches with compartments for makeup. Some have waterproof lining. They help organize and separate products so nothing gets mixed up if something does leak.
Around $10 to $30 depending on quality.
Waterproof Packing Cubes
These are larger travel organizers with waterproof material. You can pack multiple makeup items and they’re protected if anything leaks.
Silicone Seal Tape
As mentioned above, waterproof silicone tape adds extra security to your foundation cap. A roll costs a couple dollars at hardware stores.
What NOT to Do
Here are the common mistakes people make when packing liquid foundation.
Don’t Pack Foundation Loose
Never just throw a foundation bottle in your carry-on without any protection. It will leak. You will regret it.
Don’t Assume the Cap is Secure
Even if the cap feels tight, pressure changes can loosen it. Always add extra security (wrapping, tape, or bagging).
Don’t Pack Multiple Liquid Products Together
If you’re carrying multiple liquids and one leaks, it could ruin all of them. Keep different liquids separated.
Don’t Carry a Fragile Glass Bottle if Possible
Some foundation comes in glass bottles. Glass can crack from pressure changes. Plastic bottles are safer. If you must carry glass, wrap it extra carefully.
Don’t Pack Foundation at the Last Minute
You’re rushed. You don’t pack it carefully. It leaks. Pack it the night before so you have time to do it right.
Don’t Ignore TSA Rules
If your bottle is over 3.4 ounces, don’t try to sneak it through security in your carry-on. Check it or buy travel-size instead.
Timing Matters
When you pack your foundation relative to your flight matters.
Pack the Day Before
Pack your foundation at least 12 hours before your flight, ideally the day before. This gives you time to do it carefully.
If you pack 30 minutes before you leave for the airport, you’re rushing. You won’t do it properly.
Avoid Temperature Extremes Before Packing
Don’t pack your foundation right after it’s been in a hot car or cold environment. Let it sit at room temperature for an hour before packing. This ensures it’s at a stable temperature before being sealed.
Temperature fluctuation can cause expansion or contraction. You want it at equilibrium before packing.
Don’t Open Your Luggage Until You Land
Once your luggage is packed and sealed, don’t open it until you reach your destination. Opening and closing luggage creates additional air pressure changes.
What to Do If It Leaks Anyway
If despite all precautions your foundation does leak, here’s what to do.
Assess the Damage
Open your bag carefully over a trash can. See what’s affected. Often the leak is contained to the quart bag or the bag’s compartment.
Clean Immediately
Use a damp cloth to wipe up any liquid. Foundation dries and becomes harder to clean if you wait.
Treat Stained Clothes
If foundation got on clothes, treat it immediately. Rinse with cold water (not hot, which sets the stain). Use a stain remover. Wash in warm water with detergent.
Foundation stains are treatable. Don’t panic.
Dry Out Your Bag
If your luggage got wet, open it and let it air dry. Use paper towels to absorb moisture. Air dry in the sun if possible (natural light kills bacteria and helps drying).
Save Your Foundation (Maybe)
If your foundation bottle leaked but still has product inside, it’s salvageable. Let it sit open (covered loosely with a cloth) for a few hours. Some separation might occur but it usually settles.
Pro Tips from Frequent Travelers
Bring Extra Makeup for Arrival
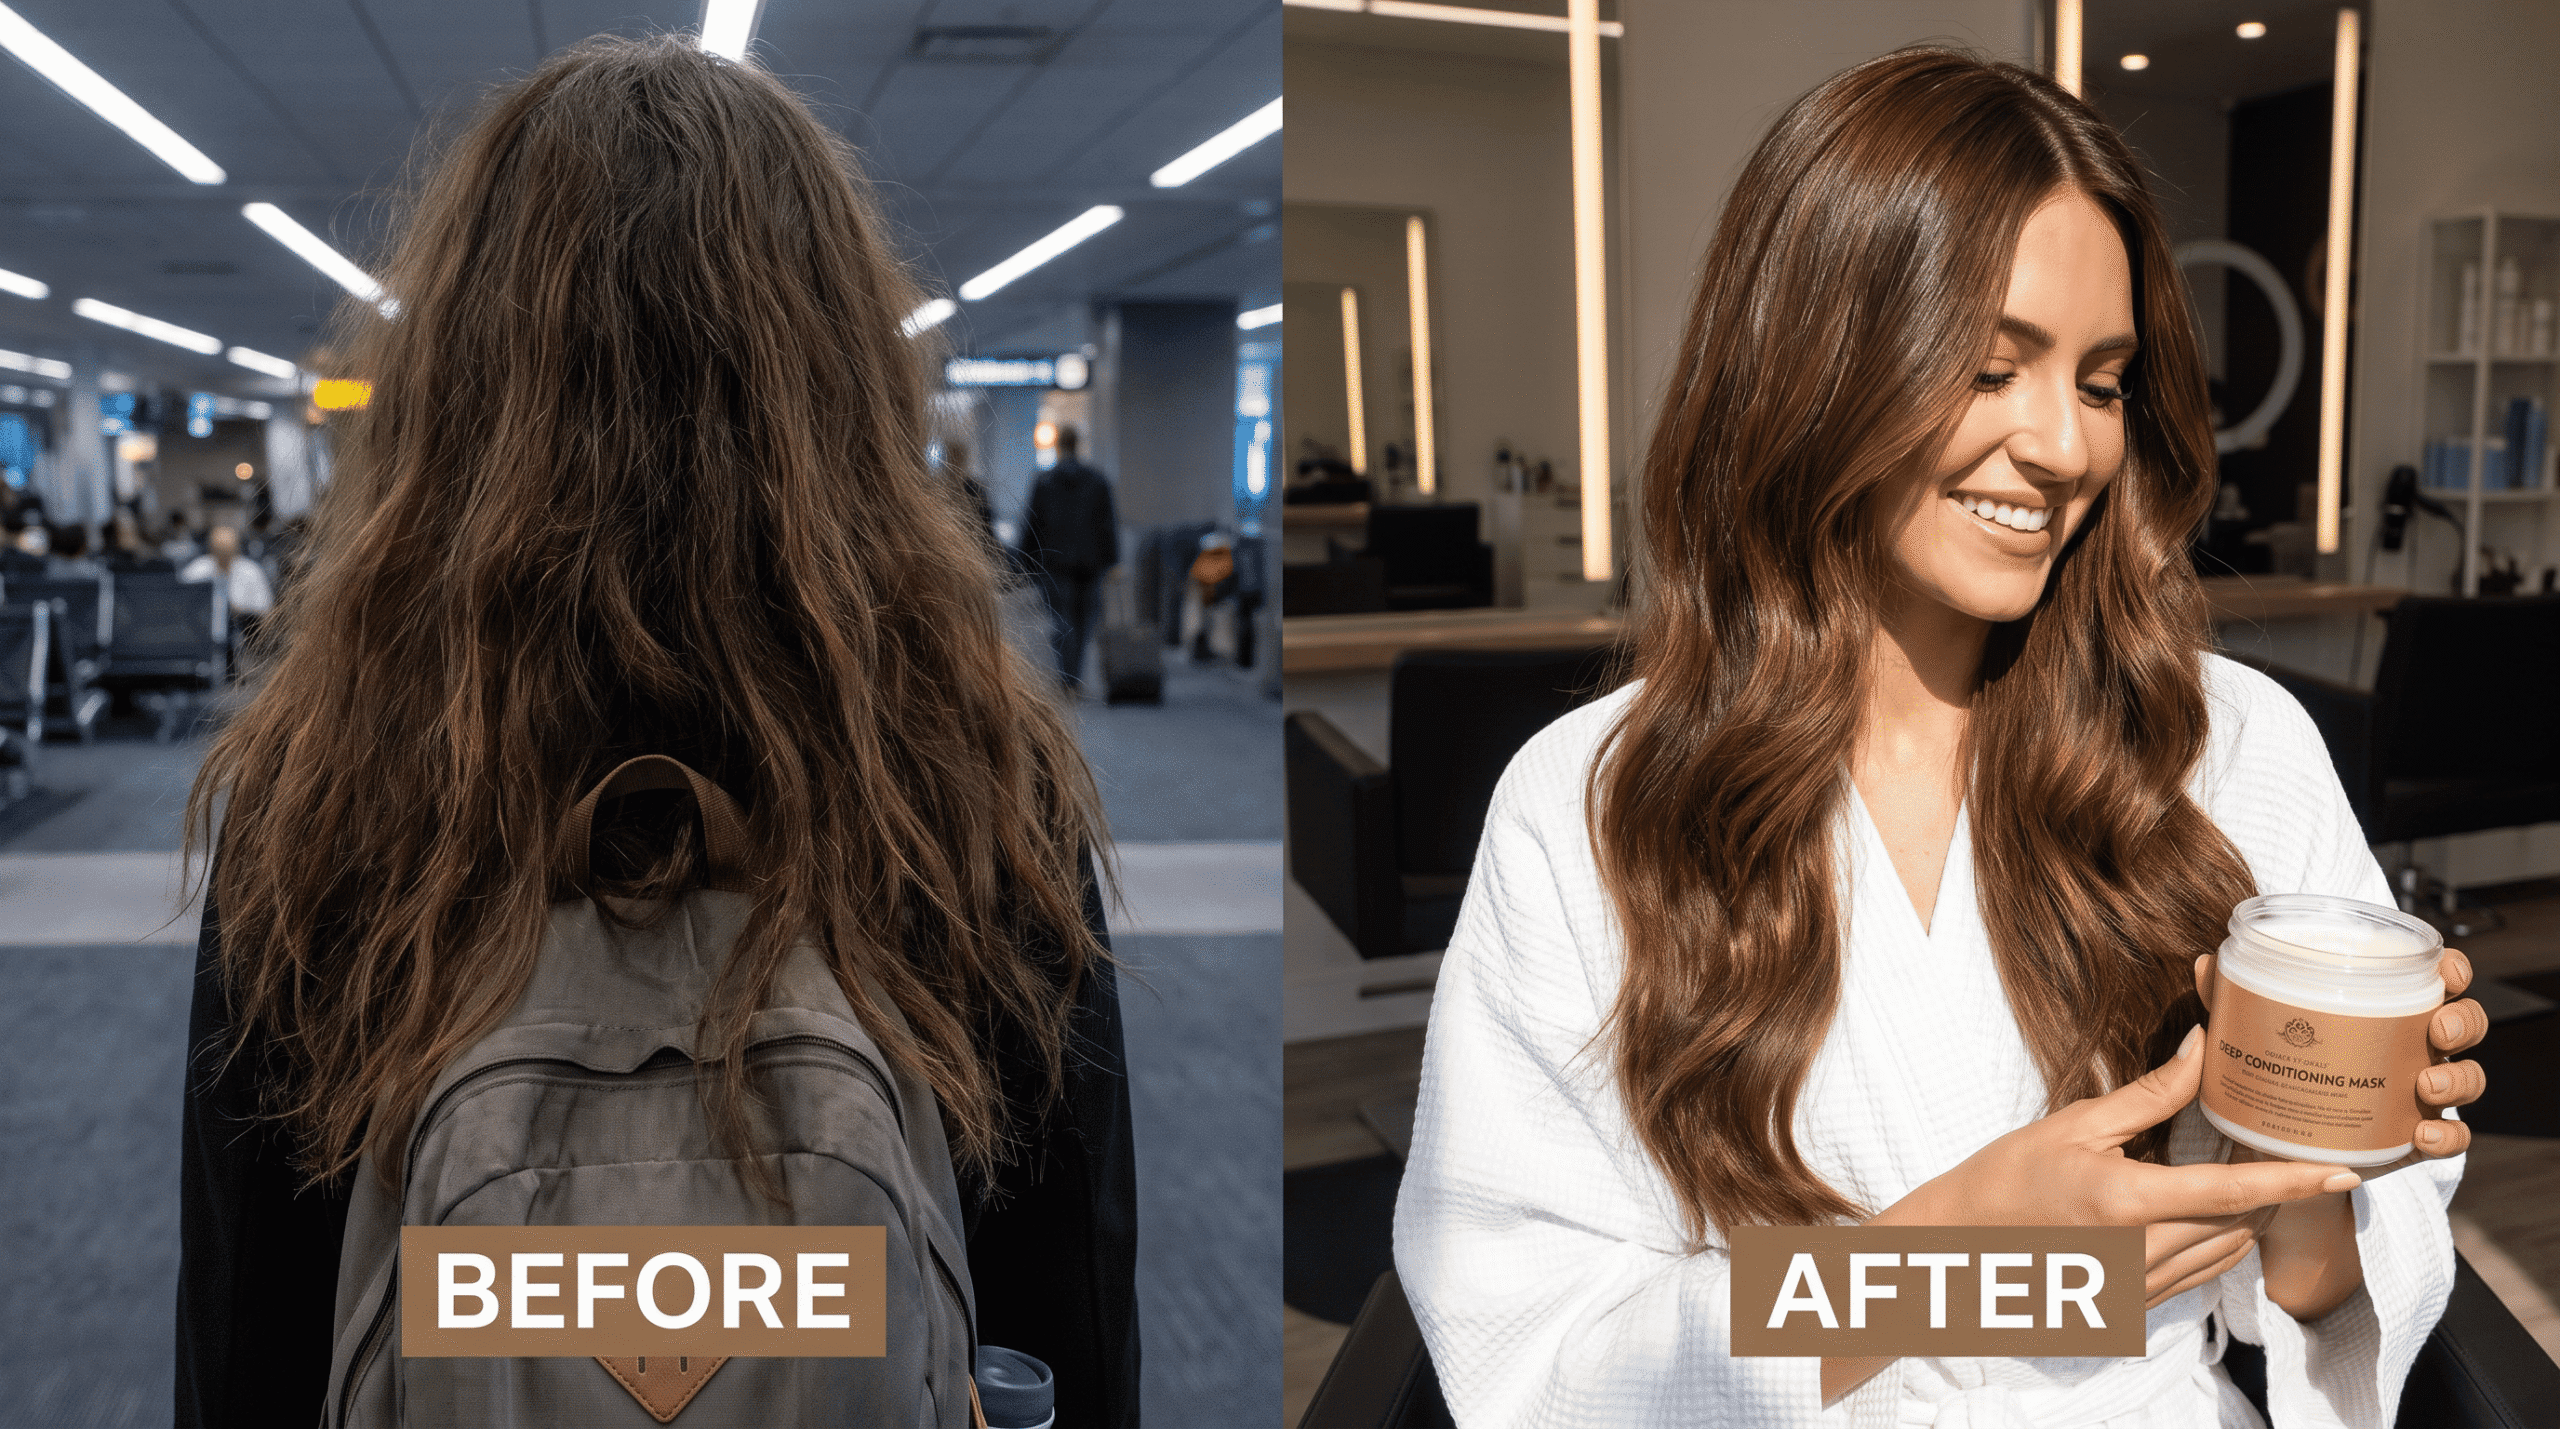
Pack a small makeup bag with basics (foundation, concealer, blush, mascara) in your carry-on. When you land after a 14-hour flight, you’ll want to freshen up. This is a practical tip: look fresh when you arrive, not exhausted. Of course, looking awake is only half the battle, so don’t forget to implement these steps on how to overcome jet lag
so your energy levels match your flawless skin
This is a practical tip: look fresh when you arrive, not exhausted.
Use Foundation Samples
Many brands offer sample sizes of foundation. Request samples from Sephora or the brand directly. Use these for travel instead of your full-size bottle.
Samples are tiny, well-sealed, and perfect for flights.
Consider Powder Foundation for Travel
I mentioned this early on but it bears repeating: powder foundation doesn’t leak. It doesn’t have TSA complications. It’s lighter and takes less space.
If you’re willing to compromise slightly on coverage and finish, powder foundation eliminates this whole problem.
Bring Blotting Sheets
After a 14-hour flight, your skin is likely oily and irritated. Dealing with sudden climate changes and breakouts is just one of the minor health concerns in Thailand you should prepare for. To combat the initial travel fatigue, use blotting sheets to remove excess oil and look fresher without a full makeup reapplication.
Much easier than trying to touch up foundation when you’re exhausted.
Keep Foundation Upright
If carrying foundation in your bag, keep it upright, not on its side. Upright orientation means the cap is at the top. Any leakage is less likely to escape from an upright bottle.
The Real Solution for Frequent Travelers
If you travel frequently and are constantly stressed about foundation leaking, consider this:
Buy travel-size foundation and rotate between buying travel-size and full-size. Use travel-size for flights. Use full-size at home. This eliminates the problem entirely.
Yes, you’re paying more per ounce for travel-size. But you’re gaining peace of mind and convenience. It’s worth it for frequent travelers.
Bottom Line
You don’t have to leave your foundation behind or stress about it leaking.
Use the quart bag method with wrapped bottle and absorbent material. Or use the silicone seal method with checked luggage. Or carry travel-size foundation in your carry-on.
Any of these methods work. Pick the one that makes sense for your trip and your packing situation.
Your foundation will arrive intact. You’ll look fresh when you land. Problem solved.